Documentation
What´s Humlix
Humlix is a web API builder and quality assurance tool that will automatically generate tests based on your examples. The test generation functionality makes Humlix unique and saves your organization much more time than creating every test manually.
Installation
Humlix is available for Windows, Mac OS, and Linux and requires a 64-bit Java runtime environment to run.
If you don’t have Humlix on your machine right now, you can download it from the Humlix web page.
Humlix can run as a desktop application on Windows and Mac OS. Just launch the installed Humlix application to get started. On Linux, you can run the following command in your CLI tool:
java -jar humlix.jar
On Linux, a web browser should launch, pointing to http://localhost:3000; otherwise, you can go to that address.
Create a test suite
You can group a collection of test requests in a test suite that you can share with others. Create a test suite either from the Home page using the Add new test suite button
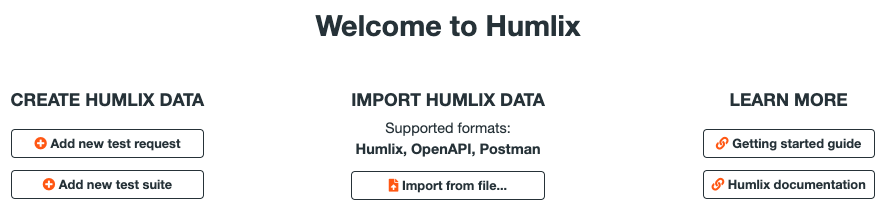
or by pressing the ADD SUITE link from the My Suites sidebar menu.

As your test suite grows, you can add child test suites to group related test requests in a more granular matter.
Create a test request
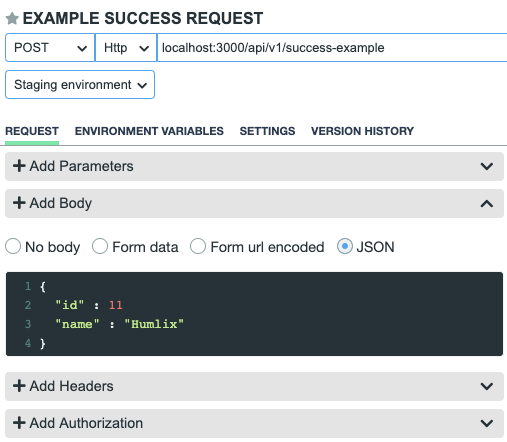
A test request represents a single test case (API endpoint request). Create a test request by going to your test suite and press the Add request link. Build your test request with example data. Humlix will use that example data during the test generation process.
You need to select a verb and schema for your endpoint and add a URL. Add query parameters using the table in Add parameters below or by entering them directly in the URL text box in the normal query parameter way e.g.
localhost:port?id=77&filter=true
Generate tests
After building your test request, you can try it out using the Run single test button. Your test will execute exactly the parameters you have entered. It can be a good idea to get this step working before generating tests.
When you are ready, you can press the Generate tests button. Humlix will start the test generation process by first calling your endpoint using precisely the parameters you have entered. If everything seems to be working, Humlix will start generating tests based on that example data.

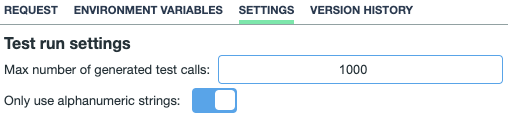
You can experiment with different test request settings in the Settings menu.
The Max number of generated test calls gives Humlix an indication of how many tests it should produce. Note that Humlix can still create more tests if a test fails. Humlix will then try to figure out the smallest repeatable failing test case, resulting in even more test cases executed.
The Only use alphanumeric strings setting tells Humlix only to generate strings containing alphabetical and numerical characters. The default is to create strings containing any symbol.
Analyzing test result
After the tests have finished, you can analyze the test result by selecting the test result tab.

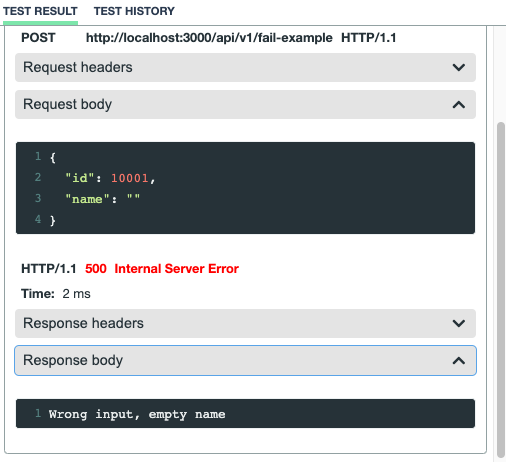
In the example above Humlix discovered that submitting a body:
{
    "id" : 10001,
    "name" : ""
}
resulted in a 500 Internal Server Error response
Wrong input, empty name
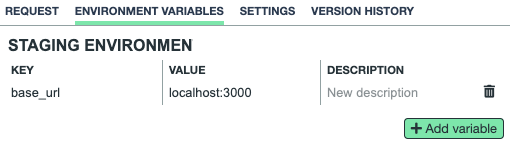
Using environment variables
It can be tiresome having to enter the same data again and again when building test requests. Therefore Humlix offers the Environment variables concept.
With environment variables, you can re-use values between test requests within the same test suite.
Depending on where your test is happening, you can choose the right environment, e.g., development- or staging environment using the environment dropdown.
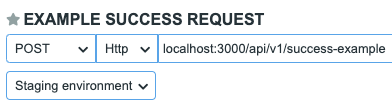
You can re-name the environment by clicking on the current name.
Environments are used in the user interface by surrounding the variable with double curly braces {{ variable }}. E.g. in the image below {{base_url}} would be translated to localhost:3001
Drag and drop
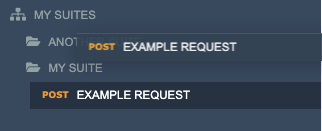
It is possible to move a test request to another test suite using drag and drop. Select the test request by pressing and holding the mouse button and drag it to another test suite and release the mouse button.
Export test suite
If you would like to backup or share your test suite, you can export it to file by pressing the Export button available on your test suite. A dialog will pop up for you to confirm or cancel the export. You will also be able to choose where you would like to save your exported file on disk.

Import test suite
Humlix lets you import a test suite from a file. Humlix supports both its internal format .fzz as well as Postman-collections.